Are you ready to build your own IoT cloud solution and connect thousands of devices? Our hands-on tutorial makes it easy to get started. We'll show you how to set up a low-cost, $1 per month Virtual Private Server (VPS) with 64Mb of memory as an example, but keep in mind that this solution can easily be scaled up by using a VPS with more memory. Our tutorial will guide you through the process of setting up an IoT cloud solution that can serve up to 10,000 unique devices (as tested), all while using fewer resources and helping to save the planet. Don't miss out on this opportunity to learn just how straightforward it can be to build your own IoT cloud solution - follow along with our tutorial today!
If you're familiar with connecting to a VPS using SSH and you're ready to get started installing your IoT cloud solution, feel free to scroll down to the script we have prepared that automates the process. However, if you're new to this process or you want a step-by-step guide, be sure to check out the video below. It will walk you through the process of setting up your IoT cloud solution and help you get up and running in no time. Whether you're a seasoned pro or a beginner, we've got you covered with the tools and resources you need to succeed.
Video 1: How to Install the IoT solution on an online VPS and how to use a domain name with the VPS
Note: The video above uses berry.pw as the VPS provider. Berry is no longer in business. See Beginner's Guide to VPS for details.
Setting up your own Virtual Private Server (VPS) may sound complicated and expensive, but the reality is that setting up a VPS is very easy and the cost can be minimal. Note that we are not affiliated with any VPS service provider. We only provide recommendations on how to install the server solution online. If you are new to VPS or if you want to know about alternatives, read the following section:
The following is meant to be a quick introduction and not an exhaustive guide in VPS technology. There are several types of VPN technology and the most common are KVM and OpenVZ. A KVM is full hardware virtualization and you can run almost any operating system on a KVM, including Windows. A KVM is technically more difficult and challenging to set up than OpenVZ. A KVM also takes considerably longer to set up since the OS needs to be installed just as you would do on a regular computer. Our recommendation is to use OpenVZ since it is so easy to set up, it literary only takes seconds to set up an OpenVZ instance. OpenVZ supports Linux only, which just happens to be the best OS for the Mako Server when it comes to managing many (IoT) connections. OpenVZ functions similar to container technology such as Docker and the kernel used is the one installed by the provider. You do not have the option of using your own selected kernel version when using OpenVZ.
Both KVM and OpenVZ share the same hardware. It is up to the discretion of the VPS service provider when it comes to how many instances they install on the actual hardware. Unfortunately, some providers have a tendency to overstock the hardware which results in intermittent sluggishness or downtime. This is especially true of low end providers. In most cases, a so called low end VPS is more than sufficient for running the Mako Server, but you need to make sure you select a provider that both looks to stay in business and does not overstock the hardware. You may select any VPS provider and if you are looking for a budget VPS you may be interested in joining LowEndSpirit.com, a community driven site with information on how to successfully use budget VPS providers. However, keep in mind that many providers overstock the physical hardware. We have had great success with securedragon. For example, the SMQ High Availability IoT Cluster Example runs on two O64 OpenVZ powered securedragon powered VPSs.
KVM is best for professional use; OpenVZ is best for learning purposes.
Another factor to keep in mind is that KVM and OpenVZ instances are running on blade servers installed in large datacenters. These datacenters may host both budget VPS providers and much more expensive VPS providers. What we have observed is that if/when a VPS goes offline, it is in most cases not the VPS that went down but the datacenter's network that went down. That means if you select a more expensive provider, the VPS will still go offline if the datacenter's network goes down.
New to Linux?
If you're new to Linux and you're feeling a bit intimidated, don't worry! An online OpenVZ powered VPS is the perfect place to start learning the command line. Even if you make mistakes or get your VPS into a state that you can't recover from, the easy-to-use web-based VPS control interface allows you to restore the VPS to its original configuration with just the click of a button. This means you can safely play around and learn at your own pace, without worrying about permanently damaging your VPS. If you do get stuck, just log into the VPS web control panel and click the re-install button - a fresh Linux VPS will be available within one to two minutes, giving you a chance to start over. So don't be afraid to dive in and start learning - an online VPS is a great way to get comfortable with command line Linux.
Top VPS providers:
The web site LowEndSpirit.com is a great place to ask questions on (budget) VPSs.
Amazon, Google Cloud, Microsoft Azure, etc.
You may opt to install the IoT solution (using our installation script) on providers such as Amazon (AWS), Google Cloud, and Microsoft Azure. These providers provide free trial periods. However, note that setting up a VPS on these providers is technically much more challenging than setting up an OpenVZ VPS on providers listed on LowEndSpirit, such as securedragon. Both AWS and Google Cloud tout free lightweight tiers and this may be an option since Mako Server is super light on resources. However, figuring out if the service can be free is difficult. In any event, you must provide credit card information when signing up, even for the free trial.
The cost of the cloud solution, for the purpose of this tutorial, is approximately $12 per year, which includes a VPS and domain name.
We use the Mako Server Engine running as a background service on the Linux operating system to provide the device to SMQ Broker communications. Prior Linux experience is not required, however a working knowledge of a command line interface is necessary for terminal operations.
We have selected Secure Dragon as the VPS provider in this tutorial, however, you may use any VPS provider.
You will receive an email some time after signing up. The following shows an excerpt from such an email with details that you will need when configuring and installing software on the VPS.
Use the "Root Password" link to retrieve the VPS root password. You will need this password when connecting using SSH (explained below).
When you sign up for a VPS service you get a dedicated IP address that uniquely identifies your online server. You can navigate to the VPS by simply using the IP address, but it is more convenient to use a domain name. In the following section, we will show you how to connect a domain name to an IP address.
Navigate to http://www.freenom.com, signup, and select one of the free domain names. During the registration process, select Use DNS and enter the VPS IP address in the two fields. Select 12 month period and click Continue. Your VPS should now be accessible via the domain name you registered. Note that it may take up to 48 hours before it works.
If you did not setup the DNS during the registration, do as follows:

Figure 2: The two name records that make the server accessible with or without the www prefix
The server must be installed from a Linux console and your VPS is accessible via Secure Shell (SSH). You can login to the VPS using the information provided in the email you received after signing up for the VPS service. Install the Putty SSH client if you are using Windows as your host operating system.
Using SSH, enter the server's IP address (from the email you received). You can also use the new domain name if the DNS is ready. You can test this by pinging your domain name. The ping command should respond with your server's IP address if the DNS is ready.

Figure 3: Running Putty on Windows and connecting to online VPS using the domain name simplemq.tk
At the login prompt, enter the user 'root' and the password that is set for your VPS. You can proceed to installing the Mako Server as soon as you are logged in.
The Mako Server and the SMQ LED example can be installed in two ways: automatically (by using a script we have prepared) or manually.
The following script downloads and installs the Mako Server as a Linux Daemon. The script also downloads and installs the Web Based LSP IDE and the SMQ LED Example's server side code.
Copy the following and paste into the Linux console (Putty)
You will be asked for a username and password during the installation process. The username and password let you securely mount/map your online server's home directory as a WebDAV Network Drive and securely access the LSP IDE. You will also be asked to enable the optional Let's Encrypt plugin. You may enable this plugin if you have set up a domain name as explained in the tutorial above. The Let's Encrypt plugin provides free and Automatic SSL Certificate Installation for your server by using the Let's Encrypt Service.
The server will be running when the installation script completes. Proceed by making sure everything is working.
Installing the server manually will give you a deeper understanding of how to manage and install software on an online VPS. Note that the following instructions do not include installation of the LSP IDE, which is installed when using the automatic installation option above.
To manually install the Mako Server and configure the Mako Server, proceed to the tutorial Installing Mako Server as a Service on Linux and navigate back to this tutorial when you have completed the installation process.
When the server is installed, enter the following commands (or copy and paste) into the SSH terminal window (you must be running as root):
The above commands download a prepackaged SMQ LED example application (IoT-LED-Broker.tar.gz ) and install the package in the 'www' directory. The last command restarts the Mako Server, where the Mako Server loads the new SMQ broker application.
After completing the installation, navigate to your domain name using your browser. Use the VPS IP address if your domain name is still not working (it takes time for DNS to replicate). You should see the LED demo. The SMQ LED example's web page is included in the package (IoT-LED-Broker.tar.gz) and enables you to quickly verify that everything is working. You can delete the LED example when no longer needed.
You may enter the LSP IDE's user interface by using any non existing URL. The LSP IDE traps all non existing access by installing a 404 not found hook. Click any link to login and login using the credentials you set when installing the server.
You should be able to directly work on the server's 'www' directory from your own computer as soon as the online server is installed.
Video 2: Mounting your online server as a network drive.
Your Web File Manager and WebDAV server URL: http://server-address/fs/
We also recommend downloading the SMQ C client stack and LED example code from GitHub; then modify the example's C source code URL to point to your own domain name, compiling the example, and making sure you can connect the edge node example to your own server/broker.
Use the super easy to use SharkSSL IDE for ESP32 and connect your own ESP32 powered devices to your own cloud server.
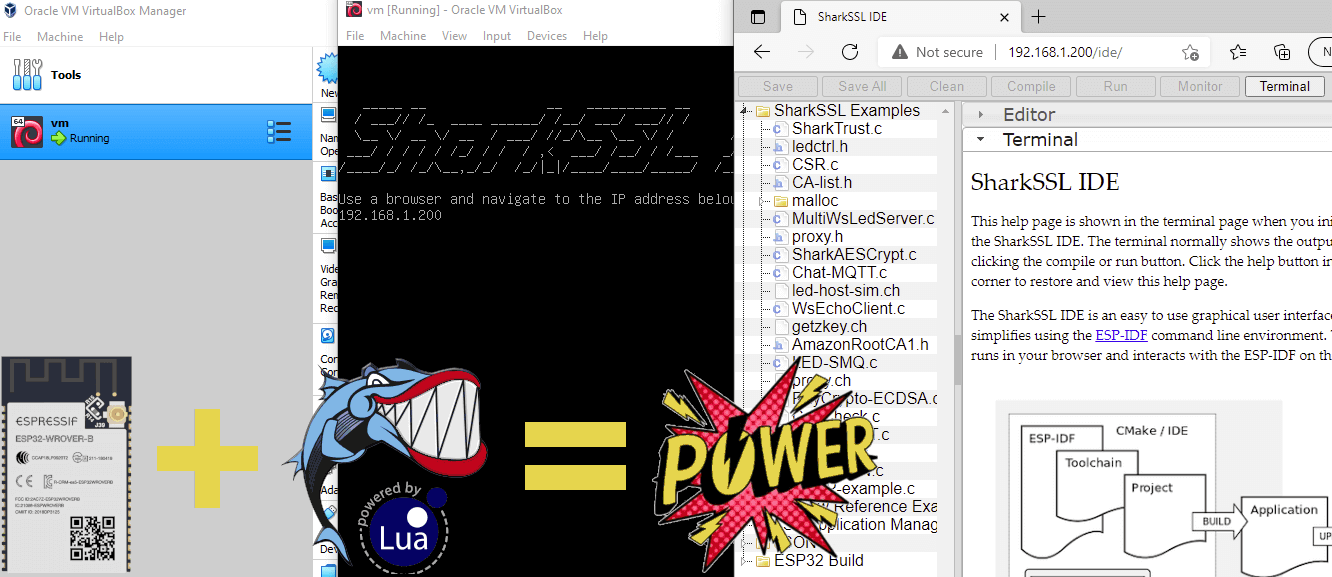
The SharkSSL ESP32 IDE
See the SMQ source code page for additional language support, including Java and JavaScript.
Our extensive tutorials on embedded web servers and IoT are your roadmap to success. But every journey can have its challenges. Our seasoned experts are here to pave the way if you're pressed for time or hit a roadblock. At Real Time Logic, we equip you with knowledge and offer a helping hand when you need it most. Together, let's achieve the extraordinary!
Expedite your IoT and edge computing development with the "Barracuda App Server Network Library", a compact client/server multi-protocol stack and toolkit with an efficient integrated scripting engine. Includes Industrial Protocols, MQTT client, SMQ broker, WebSocket client & server, REST, AJAX, XML, and more. The Barracuda App Server is a programmable, secure, and intelligent IoT toolkit that fits a wide range of hardware options.
SharkSSL is the smallest, fastest, and best performing embedded TLS stack with optimized ciphers made by Real Time Logic. SharkSSL includes many secure IoT protocols.
SMQ lets developers quickly and inexpensively deliver world-class management functionality for their products. SMQ is an enterprise ready IoT protocol that enables easier control and management of products on a massive scale.
SharkMQTT is a super small secure MQTT client with integrated TLS stack. SharkMQTT easily fits in tiny microcontrollers.
An easy to use OPC UA stack that enables bridging of OPC-UA enabled industrial products with cloud services, IT, and HTML5 user interfaces.
Use our user programmable Edge-Controller as a tool to accelerate development of the next generation industrial edge products and to facilitate rapid IoT and IIoT development.
Learn how to use the Barracuda App Server as your On-Premises IoT Foundation.
The compact Web Server C library is included in the Barracuda App Server protocol suite but can also be used standalone.
The tiny Minnow Server enables modern web server user interfaces to be used as the graphical front end for tiny microcontrollers. Make sure to check out the reference design and the Minnow Server design guide.
Why use FTP when you can use your device as a secure network drive.
PikeHTTP is a compact and secure HTTP client C library that greatly simplifies the design of HTTP/REST style apps in C or C++.
The embedded WebSocket C library lets developers design tiny and secure IoT applications based on the WebSocket protocol.
Send alarms and other notifications from any microcontroller powered product.
The RayCrypto engine is an extremely small and fast embedded crypto library designed specifically for embedded resource-constrained devices.
Real Time Logic's SharkTrust™ service is an automatic Public Key Infrastructure (PKI) solution for products containing an Embedded Web Server.
The Modbus client enables bridging of Modbus enabled industrial products with modern IoT devices and HTML5 powered HMIs.


